Managing game animations in Maya can be tricky. Especially when those animations are variations on the same thing or have different frame ranges etc.
This tool facilitates easy management of animations and exporting.
To install, download the following file and drag - drop it into Maya’s viewport.
You will get a new shelf icon in whichever shelf is currently active.


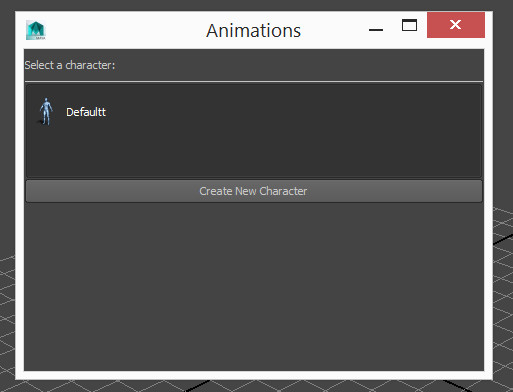
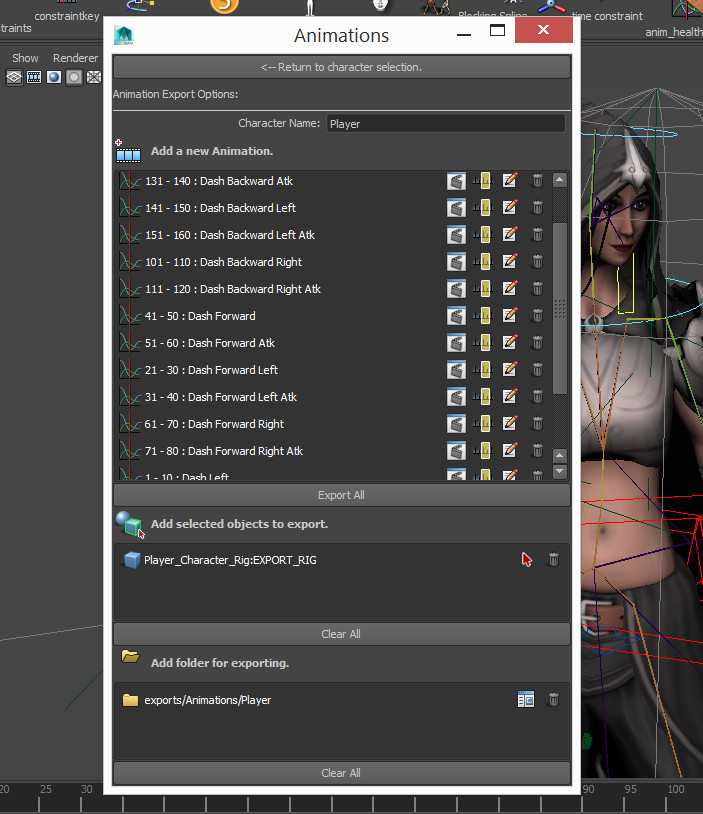
Character Name: This name will feature in the selection window (above) and will also prefix any animations exported from this window. “CharName@Animation_Name”
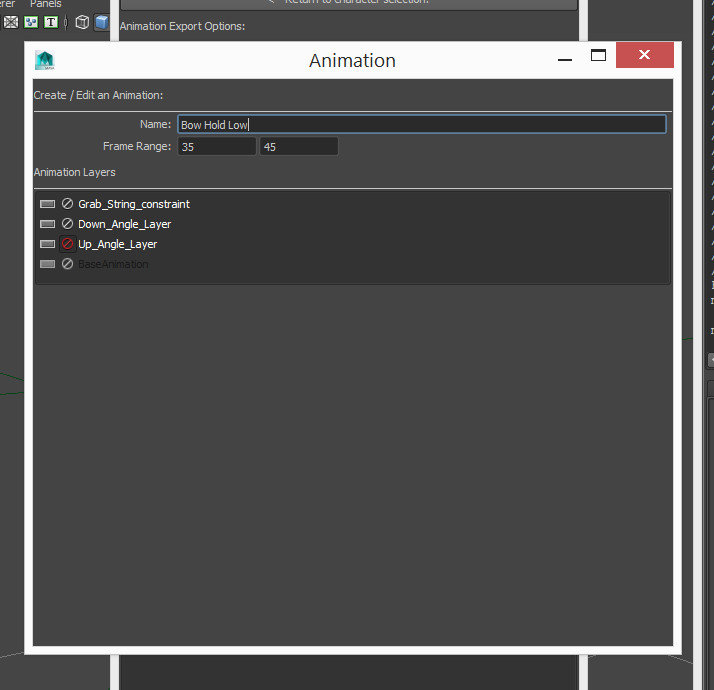
Add New Animation: Will prompt you with the animation window (below). Details are filled out on the fly. No need to hit save.
Animation Section: Contains each animation, its frame range and a bunch of convenience buttons. All of which can be moused over for more details. Buttons from left to right:
Trash: Delete the clip.
Export All: Exports every animation in the box above it.
Add Selected Objects to Export: Adds objects selected to the list below. Objects (and their decendants) here will be included in the export. Generally you want to add the skeleton of the rig in this box.

Name: Name of the animation. Seen in the window (above)
Frame Range: Range of the animation. This does NOT need to be same as the full timeline. When exporting animations this range will be made the current range just prior to export. This means you can have multiple animations in the same file and export them all separately.
Animation Layers: Correct combination of animation layers required for this animation clip. You can use animation layers to alter animations and export them as different clips. An example is to have a running character run on a 45 degree angle. Click the mute / Solo buttons here to tell it which layers need to be on / off during export.